
Install Debian 10 Buster and Froxlor 0.9 on a Hetzner EX52 server
After some incidents with bad performance, shitty network links and extremely outdated software (Debian 8 in 2019, wtf?) I finally landed at the renowned server provider Hetzner. Hooray!
A Hetzner EX52 server is a really nice machine. Two 8 terabyte harddrives (that I extended with two SSDs) and 64GB of DDR4 RAM are a lot of power under your fingertips.
But it was neccessary two get around two hurdles on this machine, that I’m going to talk about in the following passages:
- Debian 10 Buster will be released soon. Because of that, setting up Debian 9 it didn’t make any sense to me. As of this writing there are no official images from Hetzner for the new operation system and version 9 is too old for the network adapter inside the EX52 machine.
- Froxlor 0.9 does not support Debian 10 officially, yet. Support for this will be added in version 0.10 which is only available as a release candidate right now.
The initial installation
First of all I needed to install a Debian 9 by using the Hetzner Rescue-System and update it to version 10 in a chroot environment. During the installation I chose to format the two SSDs in the machine in RAID1 format. This will be automatically created and the Debian data files are available on the device /dev/md2 afterwards.
It was fairly easy to mount the Debian 9 installation on /mnt and use it as a root directory:
mount /dev/md2 /mnt
chroot /mnt
Until we can upgrade this to Debian 10, we need to make sure that /dev/, /proc/ und /boot/ are available outside of the chroot. Otherwise, the bootloader cannot be written correctly and the machine will not come back up anymore.
mount -o bind /dev /mnt/dev
mount -t proc none /mnt/proc
mount /dev/md/1 /mnt/boot
Inside of the chroot we can now upgrade to Debian 10 Buster with the following commands.
First of all, Debian 9 needs to be up-to-date:
apt-get update
apt-get -y upgrade
apt-get -y dist-upgrade
After that, we’ll change all references in the package list to the new version:
sed -i 's/stretch/buster/g' /etc/apt/sources.list
Finally, we’ll upgrade the package lists and do the actual upgrade:
apt-get update
apt-get -y upgrade
apt-get -y dist-upgrade
After a reboot we’ll be running the new OS and the machine can be reached from the outside thanks to having recent network drivers.
Configure and mount the harddrives
Storage space is expensive. The built-in SSDs don’t have a lot of it for all of our customers, so I’d like to use the two 8TB harddrives in RAID 1 for the actual website data.
I had an old RAID configuration on both drives from prior testing. To delete it, I nulled out the first 100 megabytes:
dd if=/dev/zero of=/dev/sda bs=100M count=1
dd if=/dev/zero of=/dev/sdb bs=100M count=1
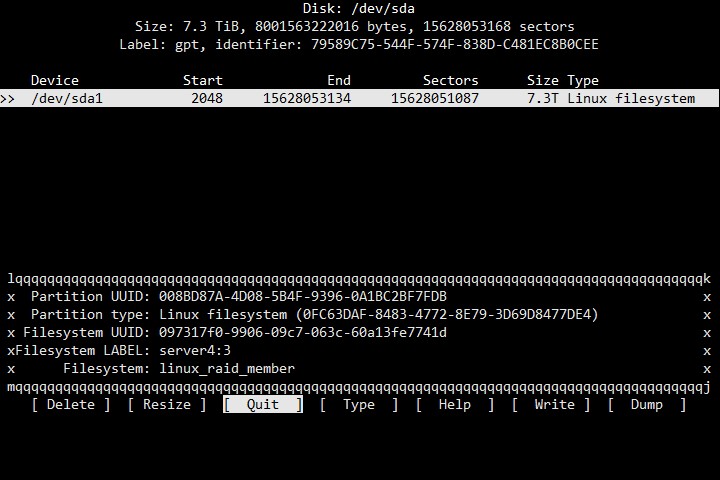
After that I used the program cfdisk to create a GPT partition table (which is important if you have more than 2TB of space) and created the same partition on both drives:
The RAID can be created with the help of mdadm:
mdadm --create /dev/md/127 --level=1 --raid-devices=2 /dev/sda1 /dev/sda2
I need to have this RAID available permanently on the mount point /storage . The first thing I need to do for this is reading out the UUID (because device names can change after a reboot)
lsblk -o NAME,UUID
and insert this into the /etc/fstab:
UUID=8a4fcd51-d646-4aa9-8e3f-483d28822e12 /storage ext4 defaults,usrquota 0 0
The option “usrquota” is relevant to use the quota functionality of Froxlor later.
Install the Froxlor dependencies
The server is now running and all storage devices will be mounted correctly at boot. This is amazing – but we still need to set-up the web server, mail server, databases, SSL and Froxlor itself. I took the following steps to install it.
Create and SSL certificate
The server needs to be available on the address server4.example.com. Froxlor will be able to create SSL certificates later (without using any additional software), but for the first-time configuration I decided to use the lightweight LetsEncrypt client acme.sh and create a certificate with it:
apt install git socat
git clone https://github.com/Neilpang/acme.sh.git
cd acme.sh && ./acme.sh --install --home ~/myacme --cert-home /etc/acme
acme.sh --issue -d server4.example.com –standalone
Install the web server and MariaDB
As a web server we can simply choose Apache 2.4 from the official Debian repositories:
apt install apache2
I don’t like to use the database (MariaDB) packages from Debian itself, though. They get dusty very fast and I need a recent database server. We can get current versions on the official website of the project: https://downloads.mariadb.org/mariadb/repositories/
The configurator on this website will only display the release candidate 10.4 for Debian Buster, but that’s not a problem. The stable 10.3 is available by adjusting the sources.list entry, even if it’s not listed on the website.
MariaDB can be easily installed via apt. This will also create the root password (which should be noted and kept safe).
apt install mariadb-server
Get PHP 7.3 via sury.org
PHP starts to rot very fast inside the Debian project. I want to use versions that are state-of-the-art and the best solution for that is using the packages from Ondřej Sury. These are always kept up-to-date and give me the ability to test RC versions before they are released officially.
The installation can be done with these commands:
echo "deb https://packages.sury.org/php/ buster main" > /etc/apt/sources.list.d/php.list
apt-key adv --recv-keys --keyserver keyserver.ubuntu.com 0xB188E2B695BD4743
apt install php7.3
Depending on the project different extensions for PHP will be needed. You need to decide which ones you need to install on your machine.
I prepare my machine to use FPM, because there are problems with Nextcloud and big files when php-fcgid is used. I also install the database extension for it:
apt install php7.3-fpm
a2enmod proxy_fcgi setenvif
a2enconf php7.3-fpm
a2dismod php7.3 mpm_prefork
a2enmod mpm_worker
apt install php-mysql
Install Froxlor
Now it’s time for the real deal. In this last step we will finally set-up Froxlor.
Prepare the directories
Since there’s no .deb package of Froxlor yet, I need to create the Apache VirtualHost myself and install Froxlor manually afterwards.
With the following command I create a new VHost:
mcedit /etc/apache2/sites-available/001-froxlor.conf
and insert this content:
<VirtualHost *:80>
        ServerName server4.example.com
        Redirect permanent / https://server4.example.com/
</VirtualHost>

<VirtualHost *:443>
  ServerName server4.example.com
  ServerAdmin webmaster@example.com
  Header always set Strict-Transport-Security "max-age=15768000; includeSubdomains;"
  Header always append X-Frame-Options SAMEORIGIN
  Header always append X-XSS-Protection "1; mode=block"
  Header always append X-Content-Type-Options nosniff
  Header edit Set-Cookie ^(.*)$ $1;HttpOnly;Secure

  SSLEngine on
  SSLCertificateFile /etc/acme/server4.example.com/server4.example.com.cer
  SSLCertificateKeyFile /etc/acme/server4.example.com/server4.example.com.key
  SSLCertificateChainFile /etc/acme/server4.example.com/fullchain.cer

  DocumentRoot /var/www/froxlor/html

  <Directory /var/www/froxlor/html/>
      Options +ExecCGI
      AllowOverride All
      AddHandler fcgid-script .php
      FCGIWrapper /var/www/froxlor/php-starter .php
      Order allow,deny
      Allow from all
  </Directory>

  LogLevel debug
  ErrorLog ${APACHE_LOG_DIR}/error.log
  CustomLog ${APACHE_LOG_DIR}/access.log combined

</VirtualHost>
This VHost is utilizing the certificate we’ve created with acme.sh before and makes Froxlor available on https://server4.example.com. The Froxlor data needs to be put in /var/www/froxlor/html for this to work.
We need a user that will run Froxlor:
useradd -s /bin/false -U froxlorlocal
After that, we’ll create a directory for Froxlor
mkdir –p /var/www/froxlor/html
and create a PHP starter that will be used in conjunction with fcgid to deliver the content:
mcedit /var/www/froxlor/php-starter
chmod +x php-starter
Content:
#!/bin/bash
export PHPRC="/etc/php/7.3/cgi"
exec /usr/bin/php-cgi7.3
After this, I extracted the Froxlor files into the html directory, changed the permissions of the files and activated fcgid (which will later be replaced with FPM):
cd /var/www/froxlor/html/
chown –R froxlorlocal:froxlorlocal *apt install libapache2-mod-fcgid php-cgi
a2ensite 001-froxlor && a2enmod headers ssl fcgid && service apache2 restart
The actual installation and post-treatment
Froxlor can now be installed via the webinstaller by just opening up the URL we’ve set in the config files before. It’s possible that some PHP extensions still need to be installed. The setup process will display an overview of all needed extensions.
After the successful installation Froxlor will indeed be reachable, but it’s still not set-up correctly:
- First of all, the correct ip addresses and ports need to be set under “IPs and Ports”
- PHP-FPM needs to be activated in the settings to prevent Froxlor from still using FCGI.
- The command for restarting PHP-FPM is: service php7.3-fpm restart
- The path to the php-fpm configurations is: /etc/php/7.3/fpm/pool.d/
- The configuration process still needs to be done (on the menu option “Configuration”). It’s not a problem to use the instructions for Debian Stretch here, these will all work fine on Buster, too.
After all these settings have been made correctly, we can finally disable FCGI and the default FPM configuration as well as running the Froxlor cronjob afterwards to create all of the configurations automatically in the future. acme.sh can be removed afterwards, too.
a2disconf php7.3-fpm
apt remove libapache2-mod-fcgid php-cgi
a2dissite 001-froxlor
php /var/www/froxlor/html/scripts/froxlor_master_cronjob.php --force --debug
DONE! Froxlor is now completely running on Debian 10 Buster.
There’s only one thing I did afterwards: Setting a symlink to my harddrive to save my customers data on these instead of the SSDs:
mv /var/customers /storage/
ln -s /storage/customers /var/customers
Note: The default settings of Froxlor are very minimal. For example, there’s no spam filter and no TLS encryption used on the mail server.
This tutorial does not cover these topics. Please make sure you are able to adjust these settings before releasing your system into the wild.
leider macht ihre Anleitung Probleme, welche aber an einer vorher vorhandenen und gelöschten Froxlor-Installation liegen könnten.
Insbesondere auch PHP 7.4 welches installiert ist und hier nicht erkannt wird. Wie kann man das ändern?
Die Anleitung wurde noch zu einem Zeitpunkt geschrieben, als es keine offiziellen Debian-Pakete gab.
Ich würde mittlerweile sehr dazu raten, die offiziellen DEB-Pakete einzusetzen. Damit PHP 7.4 funktioniert, müssen die PHP-FPM-Einstellungen auch richtig gesetzt sein (und FPM muss laufen).